
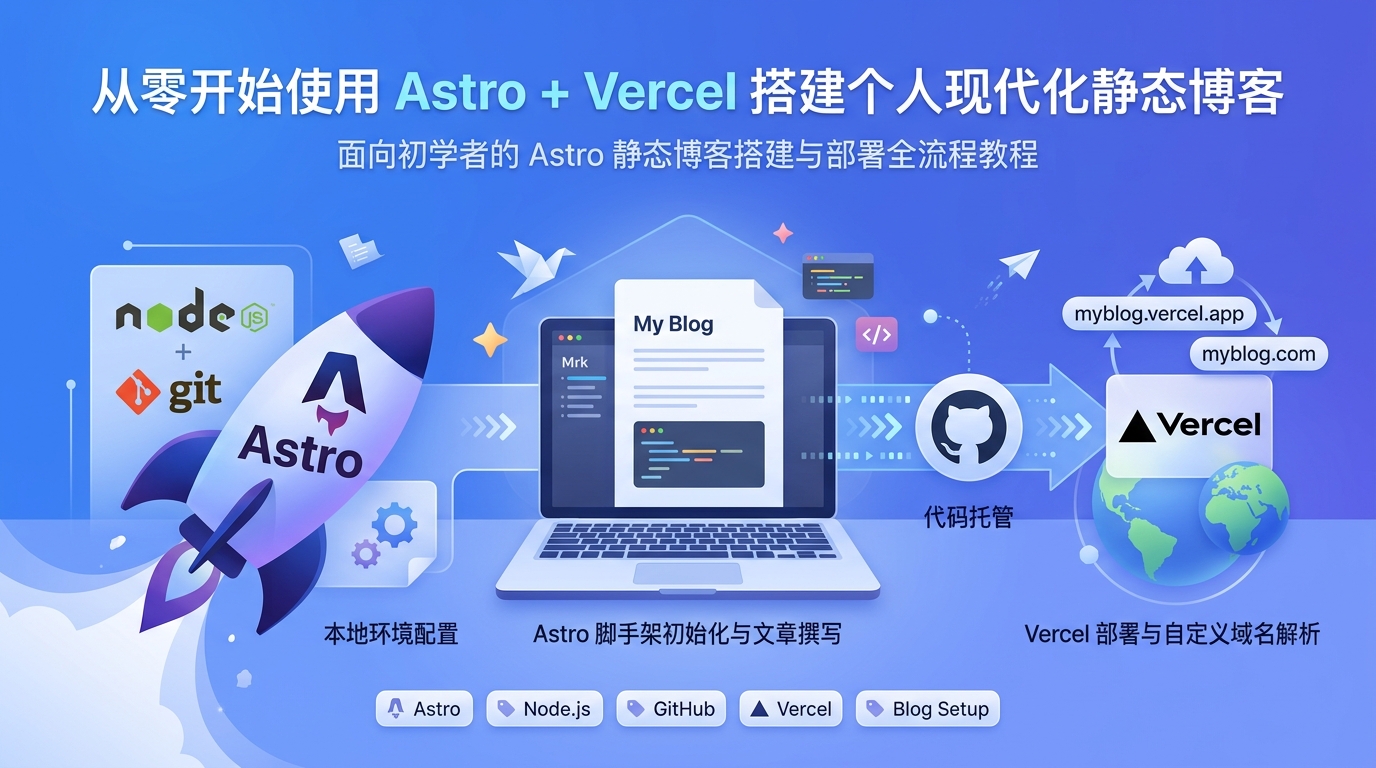
Use Astro + Vercel to build a personal modern static blog from scratch
A full-process tutorial on how to build and deploy Astro static blog for beginners. Includes local environment configuration, Astro scaffolding initialization, Markdown article writing, GitHub code hosting, Vercel automated deployment and custom domain name resolution.
1. Install local environment Node.js and Git
- Node.js (comes with npm): Go to https://nodejs.org/ to download, download the Node.js installation package, double-click to install, and complete the next step.
- Restart the command line after installation,
Run
node -vandnpm -vto see the version number, it should be correct. - Git: Go to https://git-scm.com/download/win to download the installation package,
- Download Git installation package Select “Git from the command line” when installing, and other defaults are used.
- Verify with
git --versionafter installation. - Of course, if you use AI, you can directly ask it to install the environment for you. Here is just an explanation of the required environment content.
2. Create Astro project
Find a directory where you put your code, open the command line, and enter astro to create the scaffold:
Take the Microsoft VS Code IDE tool as an example
After opening the project folder New terminal
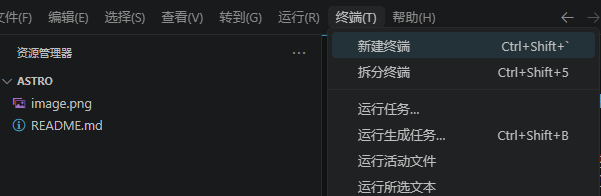 Enter the npm command to create an astro project
npm create astro@latest
#如果提示(How would you like to start your new project?)
#就是让你输入要创建到哪个文件夹内,
#直接输入.然后回车就是当前文件夹,但是文件夹内必须为空,否则不让你创
#这里我因为文件夹内有文件所以我创到了当前文件夹内的blog文件夹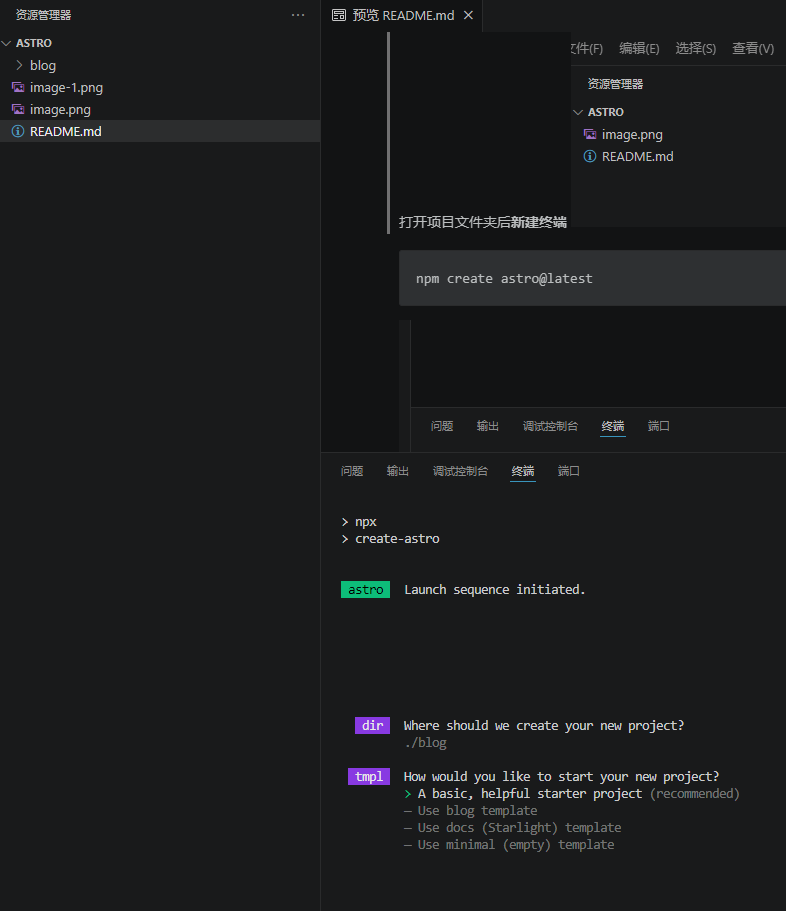 You can select the template type by pressing up or down on the keyboard\
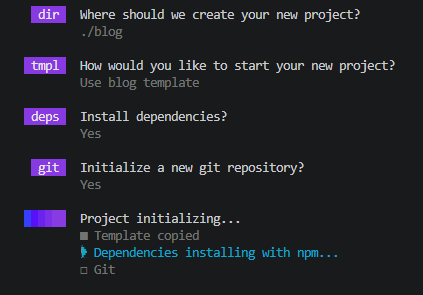
- Here is the blog I selected
- The next step is to prompt whether you need to automatically install dependencies and whether to initialize a Git repository for this project.
- I say yes here, because we need to use the git warehouse to achieve automatic updates when doing vercel deployment later.
3. Run the test
- After installation, it will display the following content
If you created the project directly in the current folder
Then you can run it directly withnpm run dev, otherwise you need to first cd to open the project directory you created and then enter to run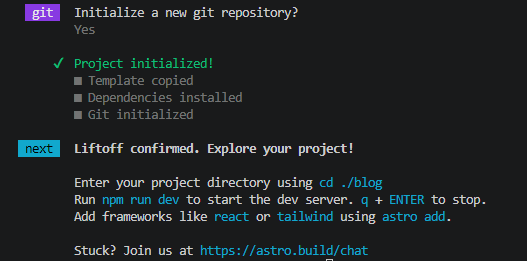
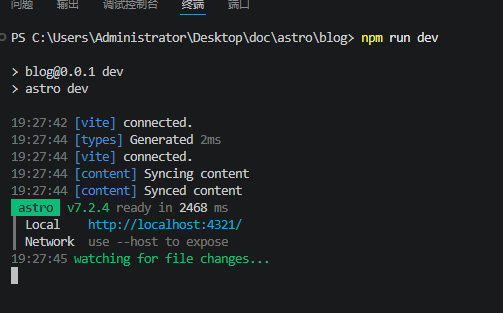
- After running, a local access address
http://localhost:4321/
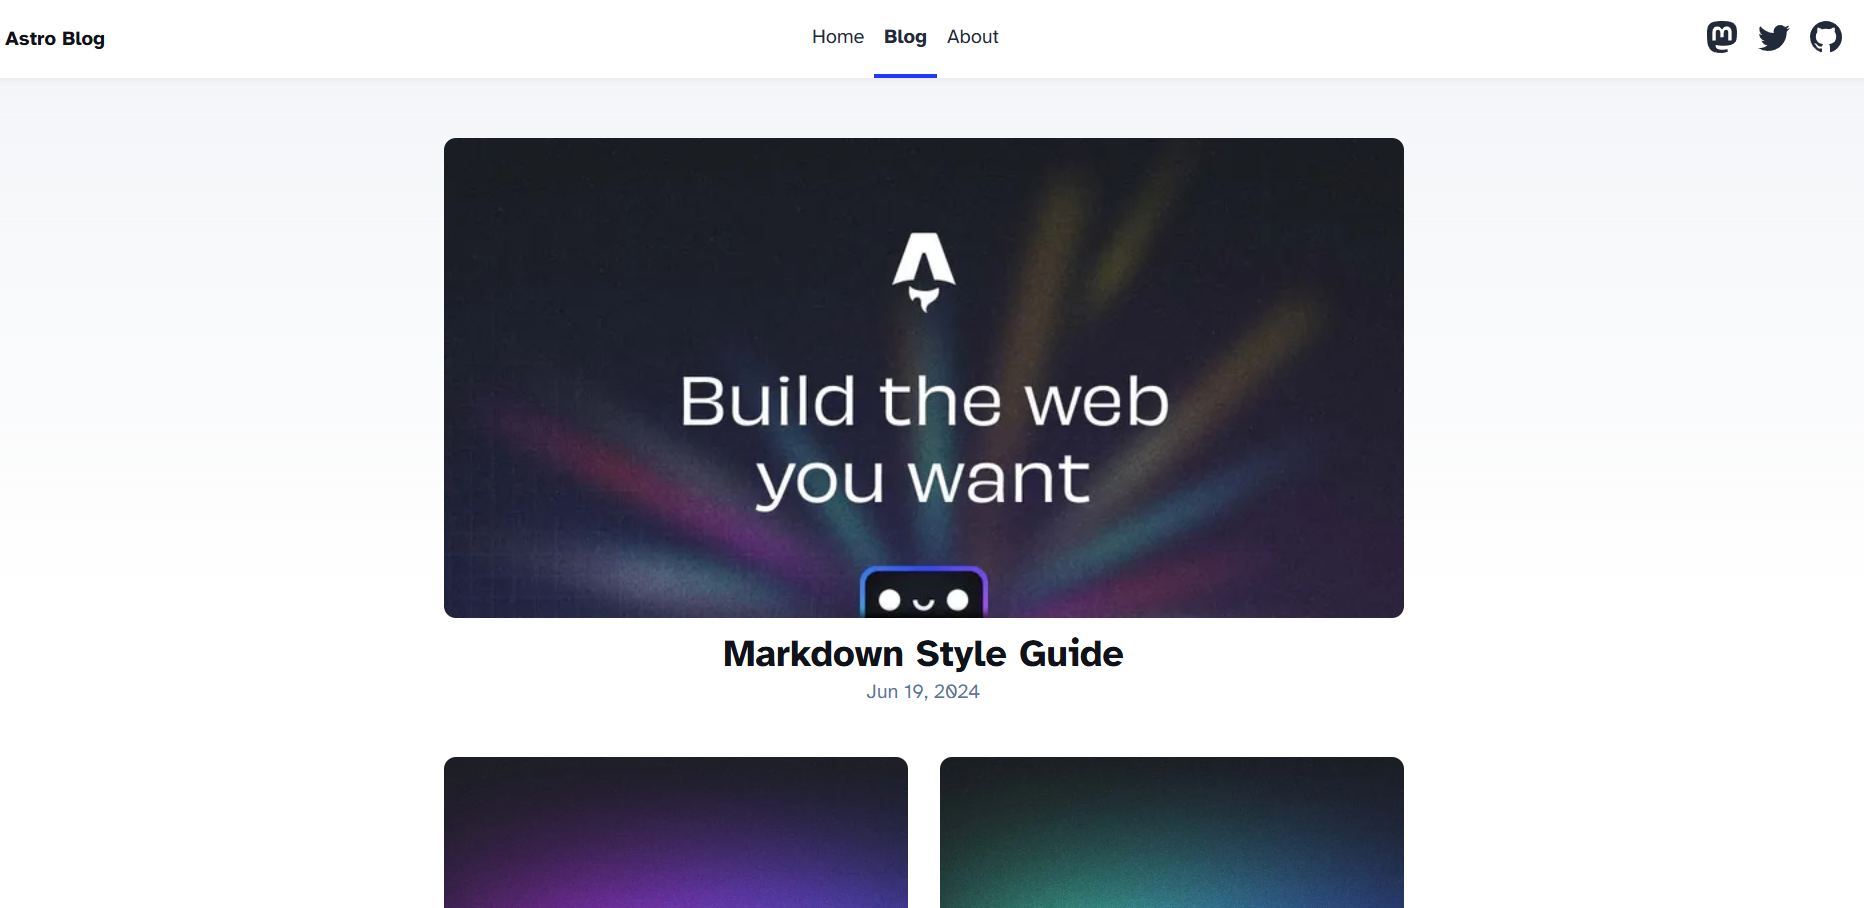
Access preview template project content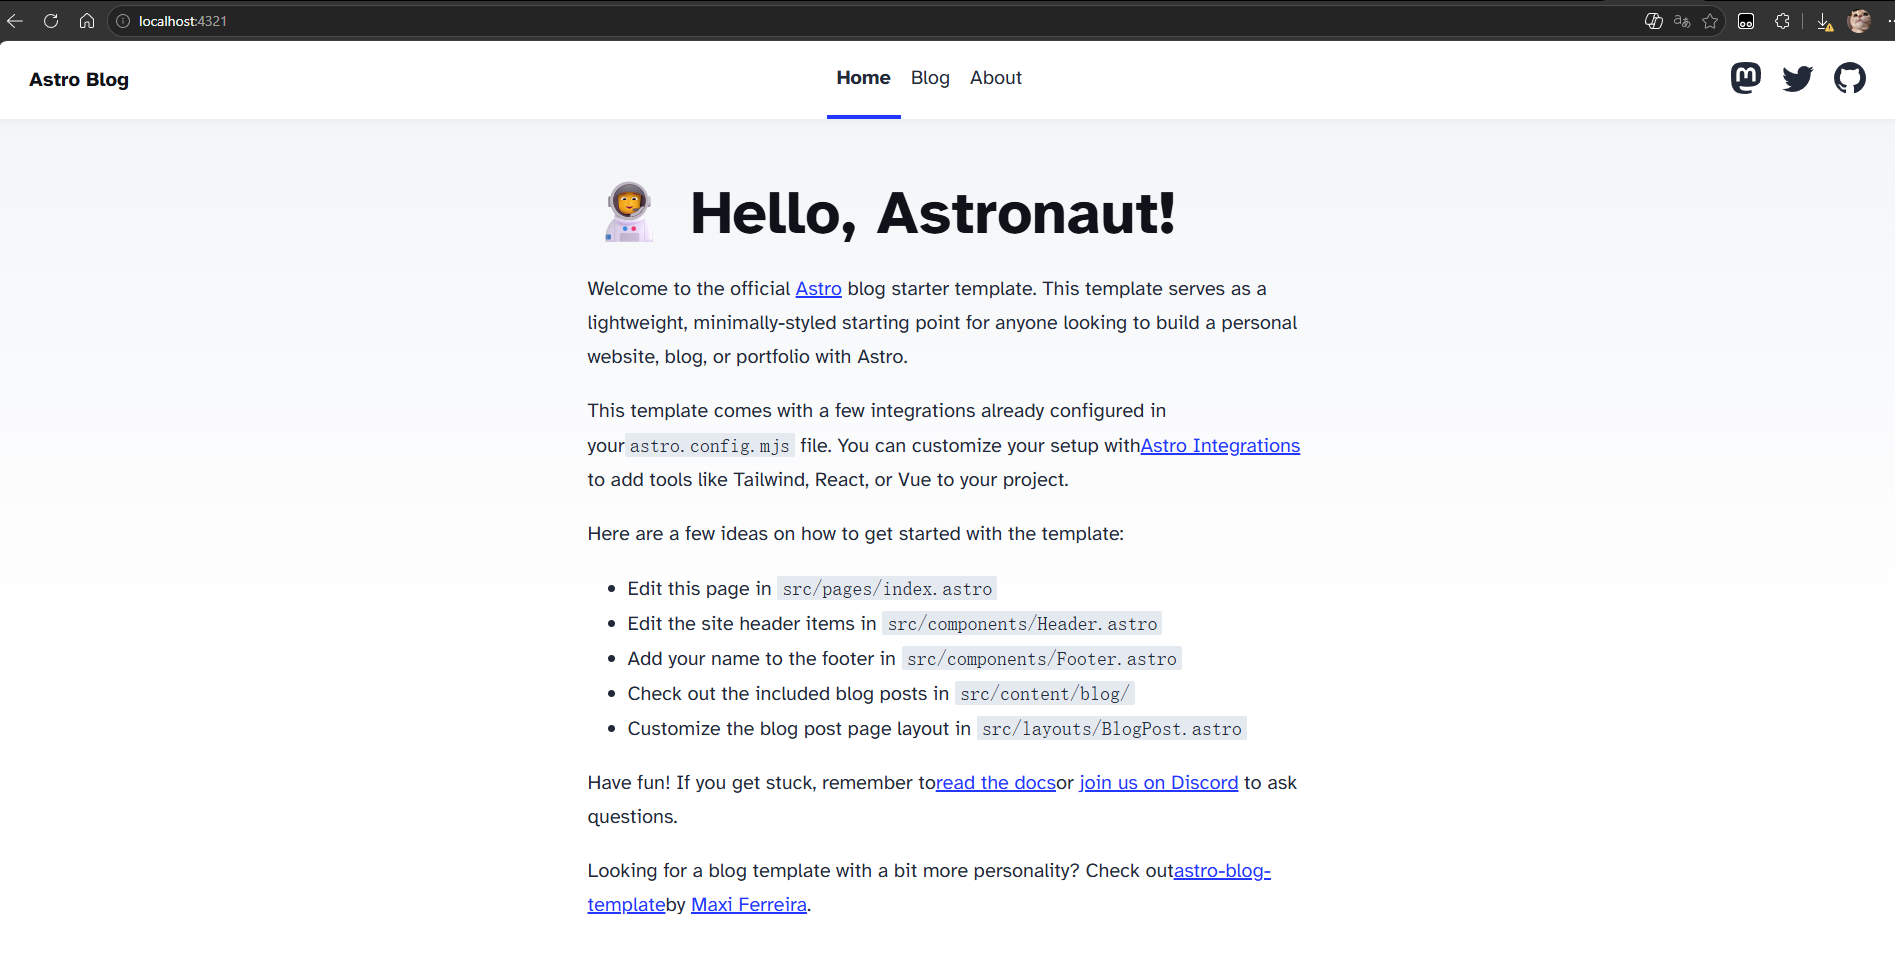
4. Write an article
-Here we use official examples to operate
The project src folder contains the complete directory structure of the project
src/
│
├── assets/ ──────────── 图片、字体等资源
│
├── components/ ──────── 可重复使用的小组件
│       │
│       ├── Header ───── 网站顶部
│       ├── Footer ───── 网站底部
│       └── BaseHead ─── HTML 基础信息
│
├── content/
│   └── blog/ ────────── 真正的 Blog 文章内容
│       │
│       ├── first-post.md
│       ├── second-post.md
│       └── third-post.md
│
├── layouts/
│   └── BlogPost.astro ─ 文章的“外壳/布局”
│
└── pages/ ───────────── 决定网站 URL 和页面
        │
        ├── index.astro
        │       └── /
        │
        ├── about.astro
        │       └── /about
        │
        └── blog/
                │
                ├── index.astro
                │       └── /blog
                │
                └── [slug].astro
                        └── /blog/文章名称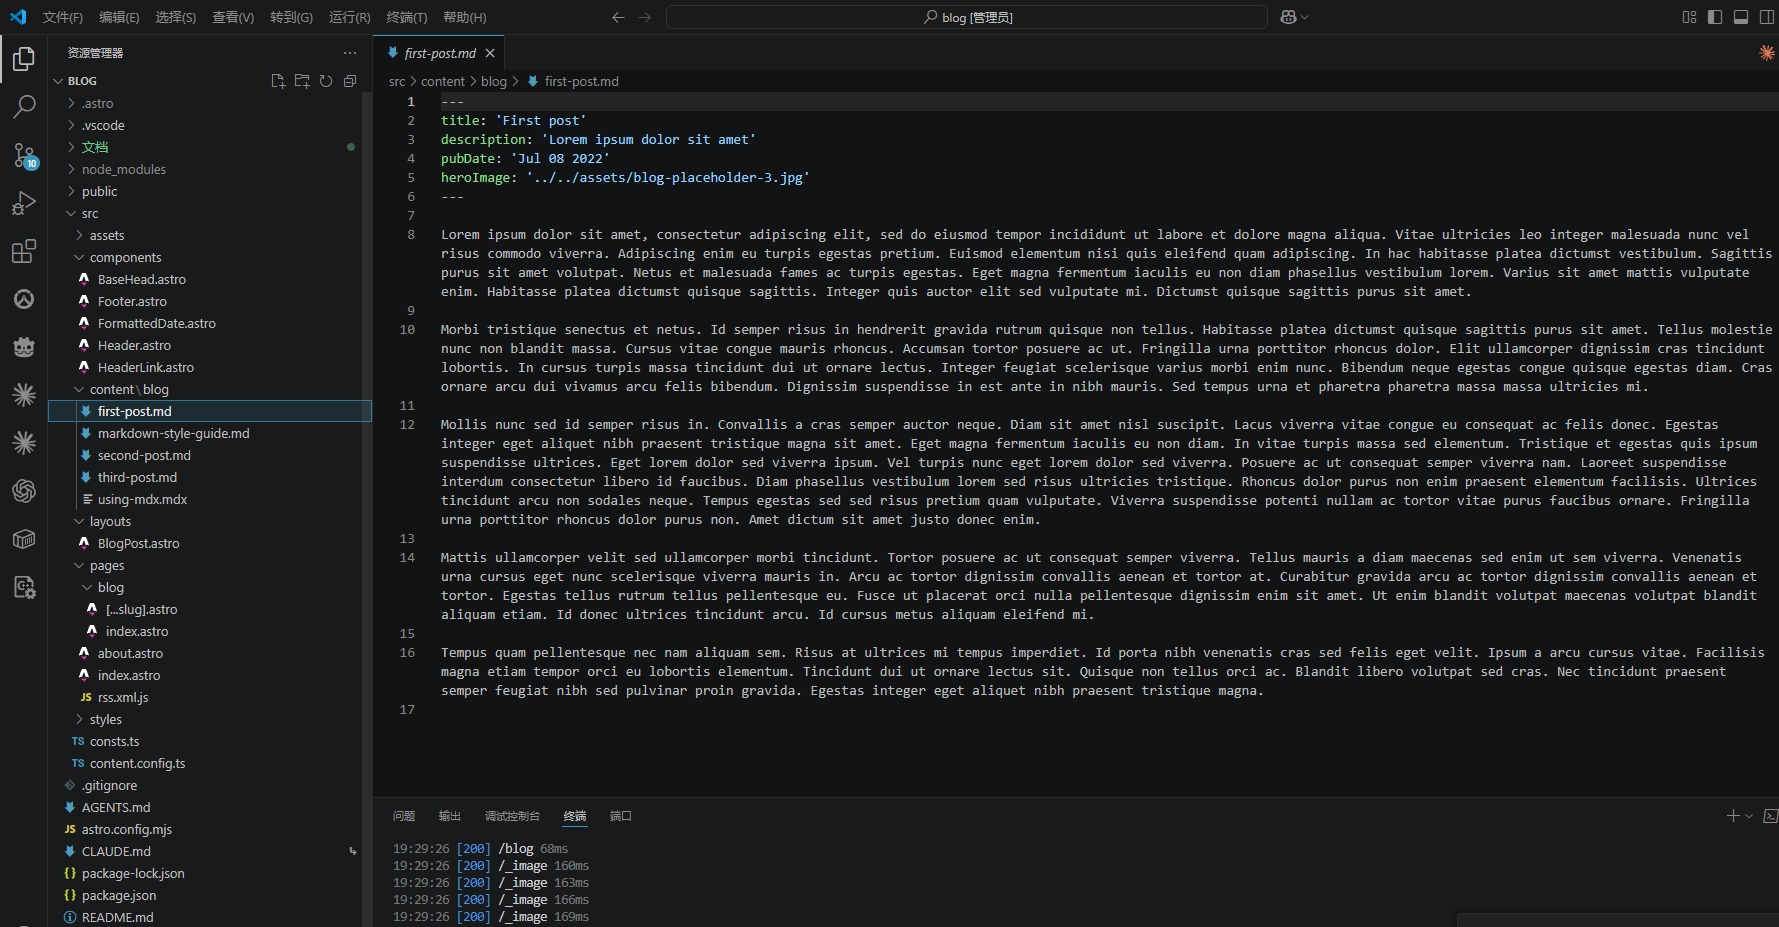
- This is the directory structure and function You can go directly to src\content\blog to create a new md file and publish it as a new article.
- The content of the article content header structure parameter is used for template display extraction
- //Example of article content
---
title: 'First post'
description: 'Lorem ipsum dolor sit amet'
pubDate: 'Jul 08 2022'
heroImage: '../../assets/blog-placeholder-3.jpg'
---

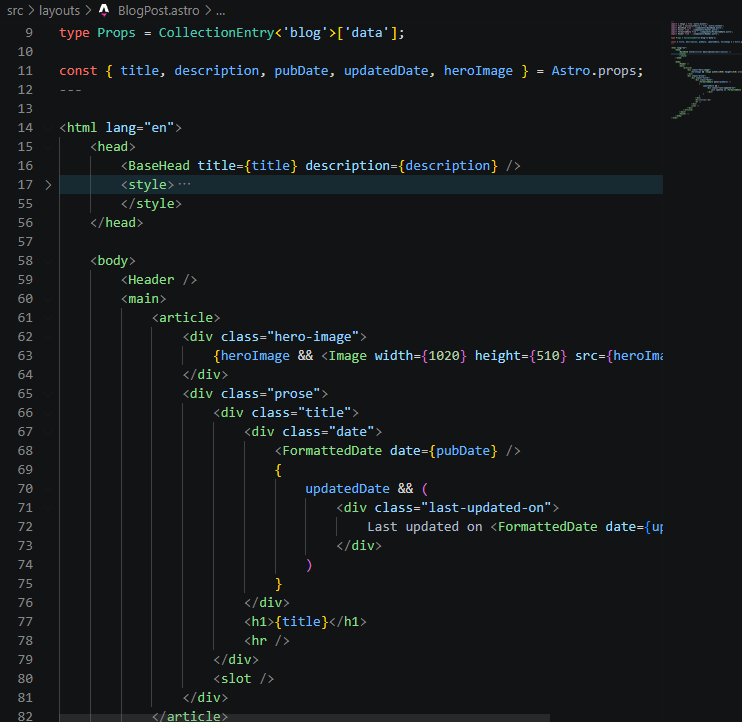
Lorem ipsum dolor sit amet, consectetur adipiscing elit, sed do eiusmod tempor incididunt ut labore et dolore magna aliqua. Vitae ultricies leo integer malesuada nunc vel risus commodo viverra. Adipiscing enim eu turpis egestas pretium. Euismod elementum nisi quis eleifend quam adipiscing. In hac habitasse platea dictumst vestibulum. Sagittis purus sit amet volutpat. Netus et malesuada fames ac turpis egestas. Eget magna fermentum iaculis eu non diam phasellus vestibulum lorem. Varius sit amet mattis vulputate enim. Habitasse platea dictumst quisque sagittis. Integer quis auctor elit sed vulputate mi. Dictumst quisque sagittis purus sit amet.- src\pages\blog[…slug].astro is a template page displayed for blog articles
- The final display uses the BlogPost component
---
import { type CollectionEntry, getCollection, render } from 'astro:content';
import BlogPost from '../../layouts/BlogPost.astro';

export async function getStaticPaths() {
	const posts = await getCollection('blog');
	return posts.map((post) => ({
		params: { slug: post.id },
		props: post,
	}));
}
type Props = CollectionEntry<'blog'>;

const post = Astro.props;
const { Content } = await render(post);
---

<BlogPost {...post.data}>
	<Content/>
</BlogPost>- After obtaining the parameters, enter the placeholder into TDK or display the content
- You can modify/create article md by yourself
5. Submit to github
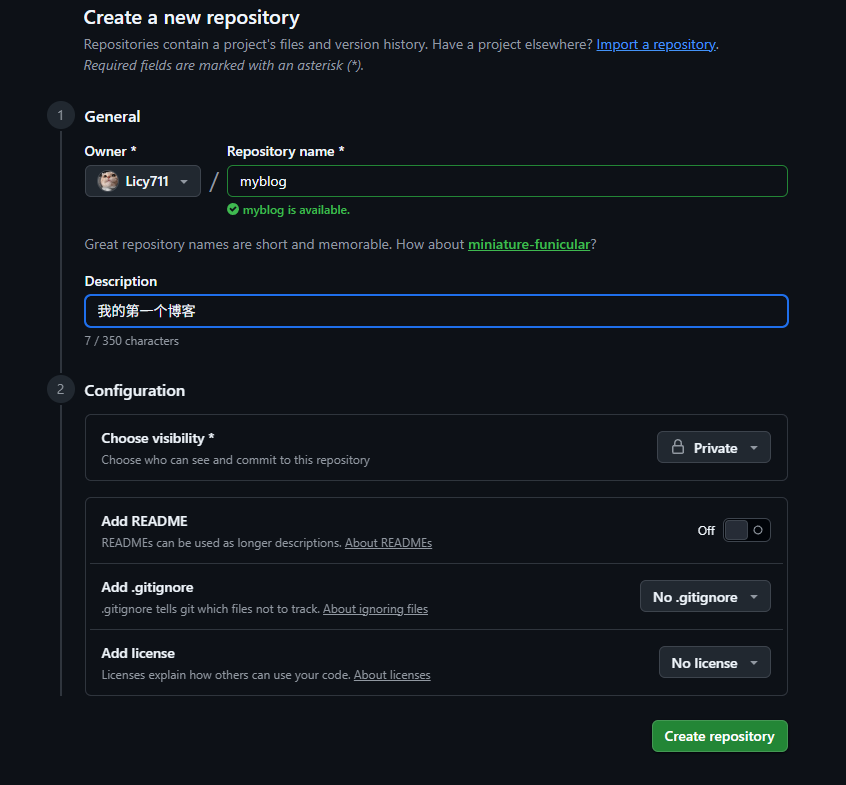
- Log in to GitHub and create a new warehouse https://github.com/new
- You can refer to the following settings
- As long as our blog is private, there is no need to check the rest.
- After creation, it will jump to the reference initial page.
- There will be a bunch of git initial instructions. Since we have already initialized the warehouse when we created astro, we only need to commit and push to the main branch.
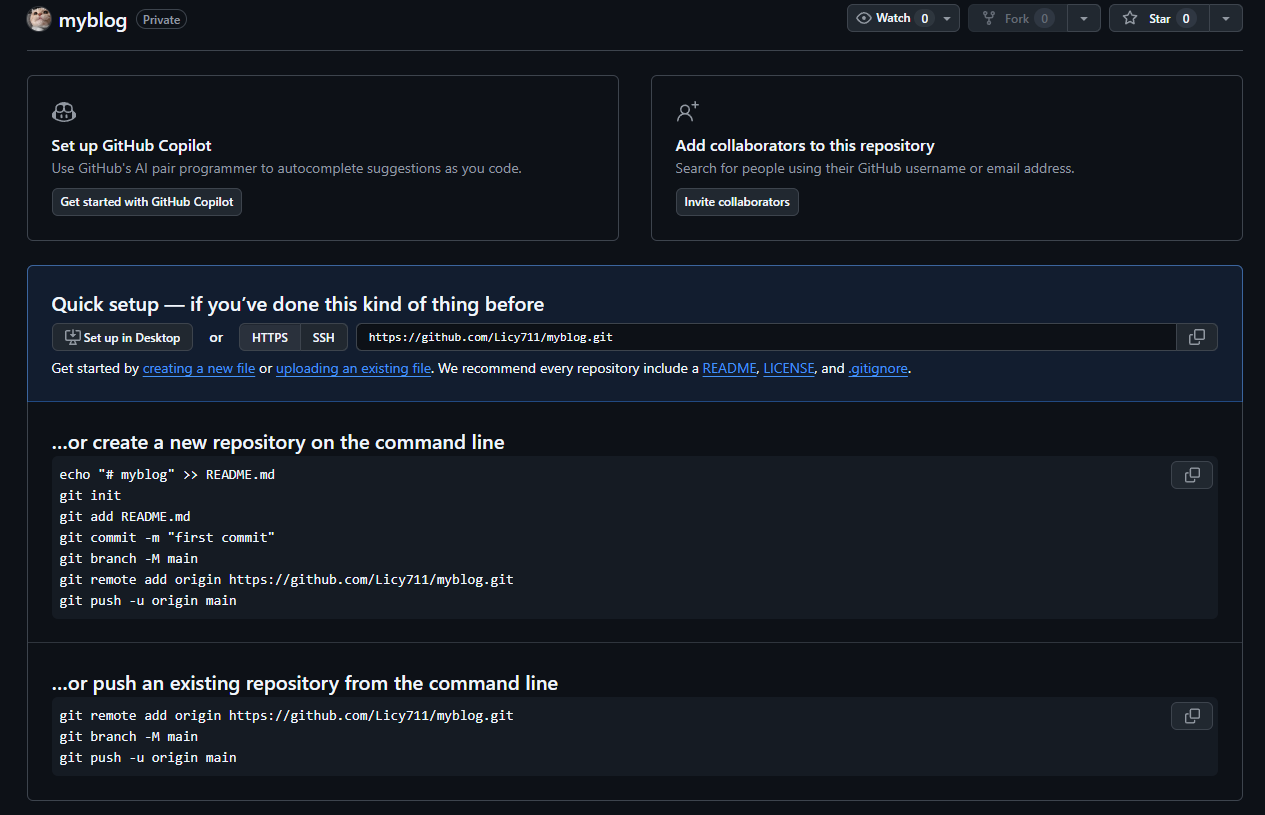
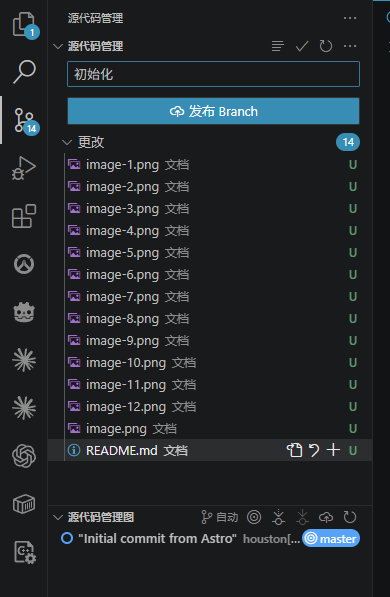
- Of course, you can also use the visual git of the IDE tool to operate. Here I will use the command as an example.
#先把当前项目文件添加至提交列表
git add .

#将add的文件commit到仓库
git commit -m "初始化"

#现在只是提交到了我们本地仓库列表内,接下来要同步到GitHub
#如果你电脑未连接过GitHub则需要先绑定GitHub账号
git config --global user.email "你的邮箱"
git config --global user.name "你的用户名"

#切换到main分支
git branch -M main
#换成你的仓库地址**https://github.com/Licy711/myblog.git**只是举例
git remote add origin "https://github.com/Licy711/myblog.git"
#提交
git push -u origin main- After submission, a verification binding will pop up. You can log in with a browser and click
- VScode may also directly prompt and then jump to bind
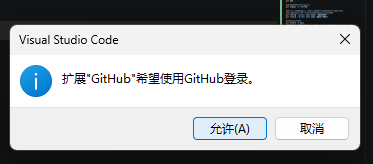
- You can log in to GitHub with your browser and click the first one (sign in with your browser)
- Here I give the second example (sign in with a code)
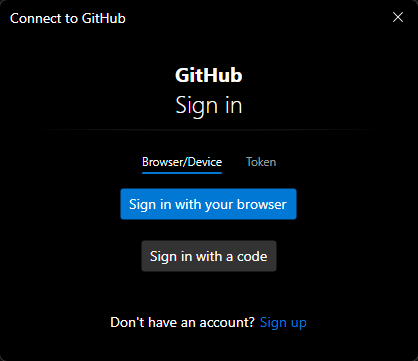
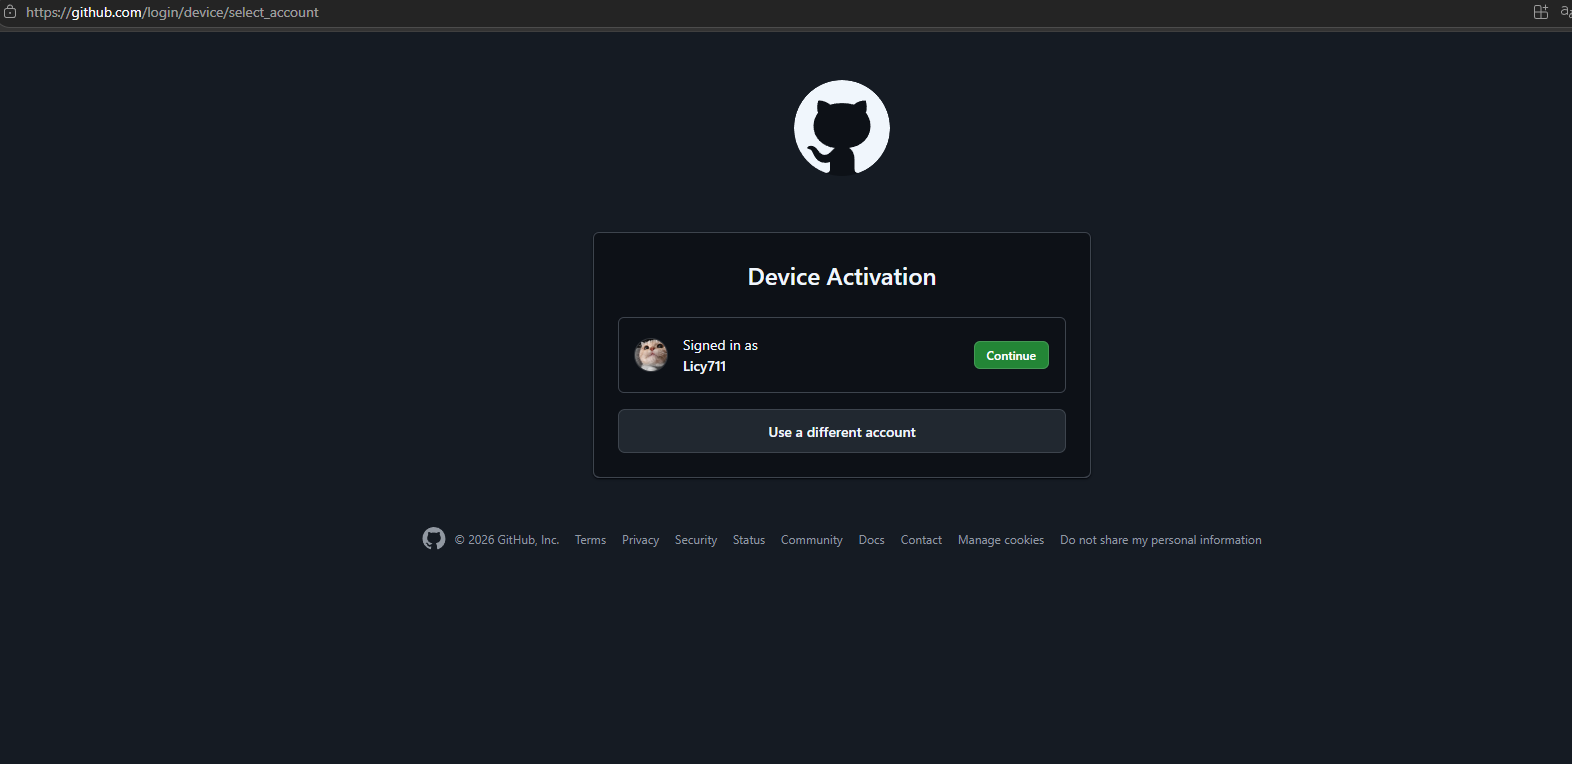
- After clicking code verification\
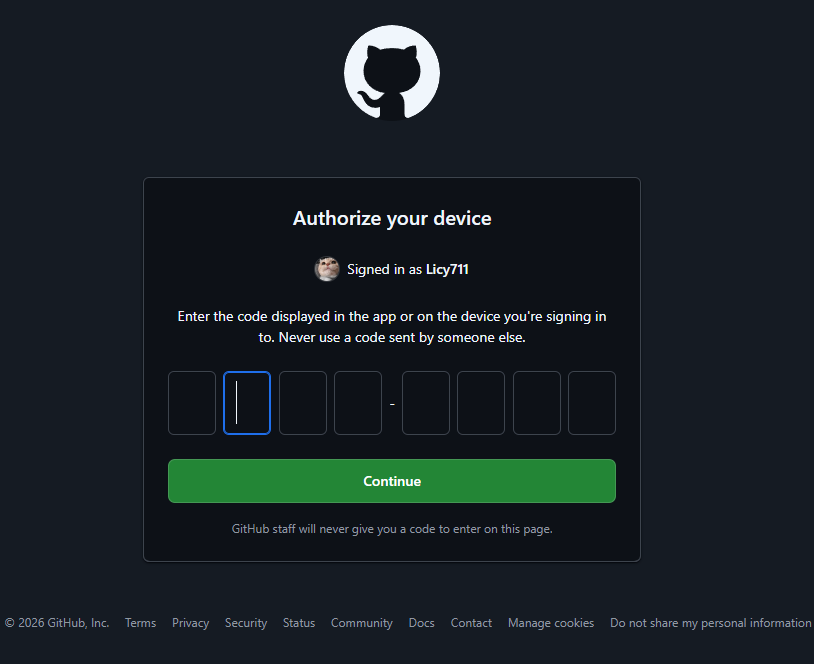
- Copy the eight-digit key and click the link below
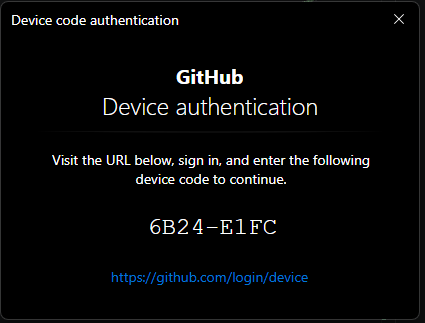
- Click to continue
- Binding is successful after entering the key
- Finally the console prompts success

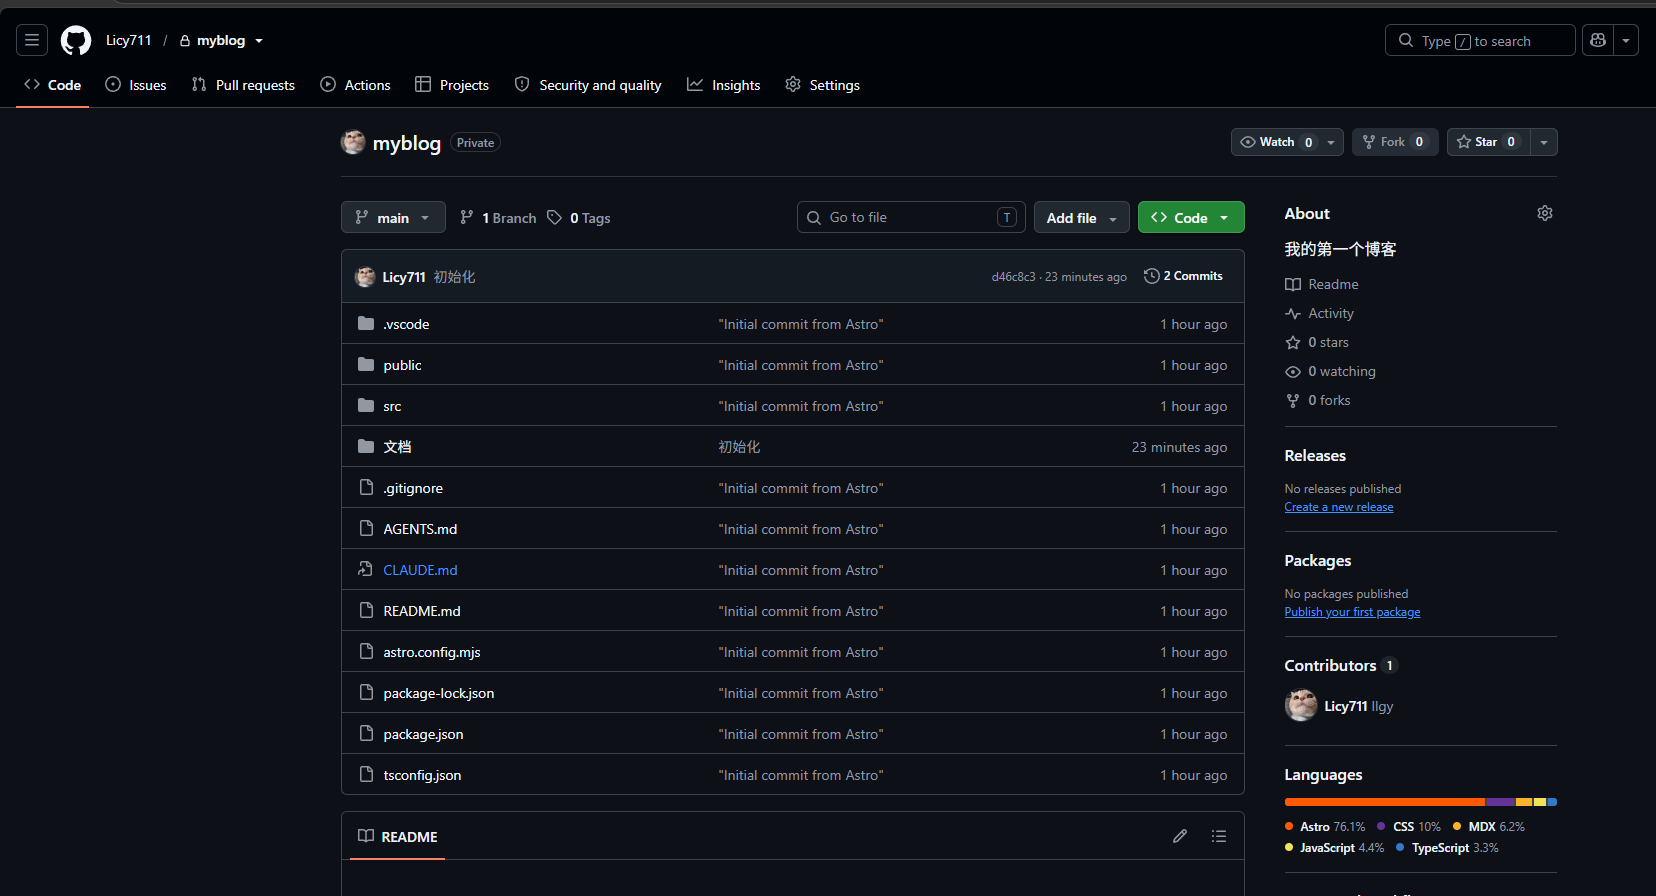
- At this point our warehouse has obtained the project code
6. Deploy vercel
-
Go to https://vercel.com/ to register and log in to enter the project list
-
Add project project

-
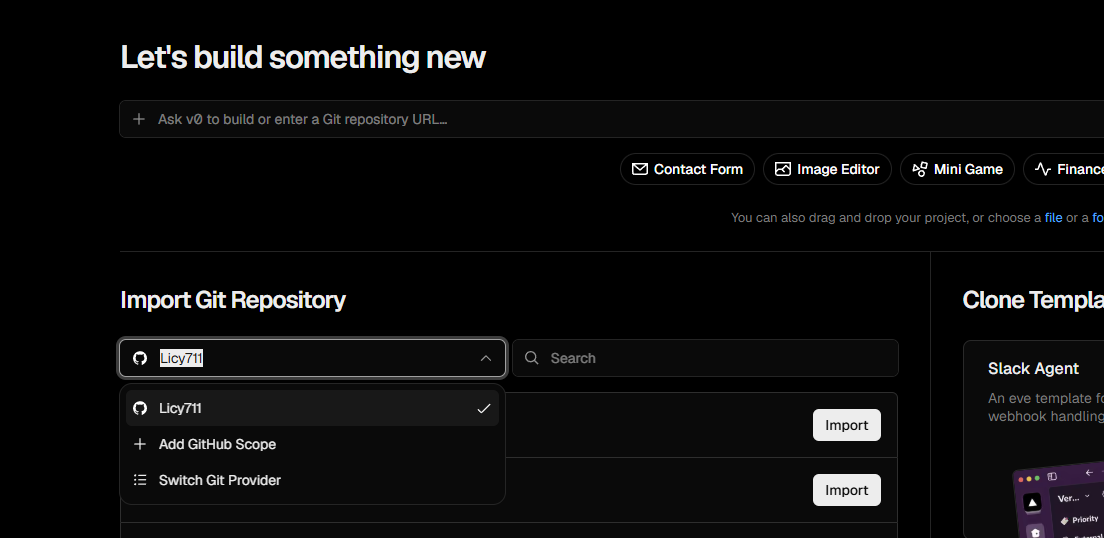
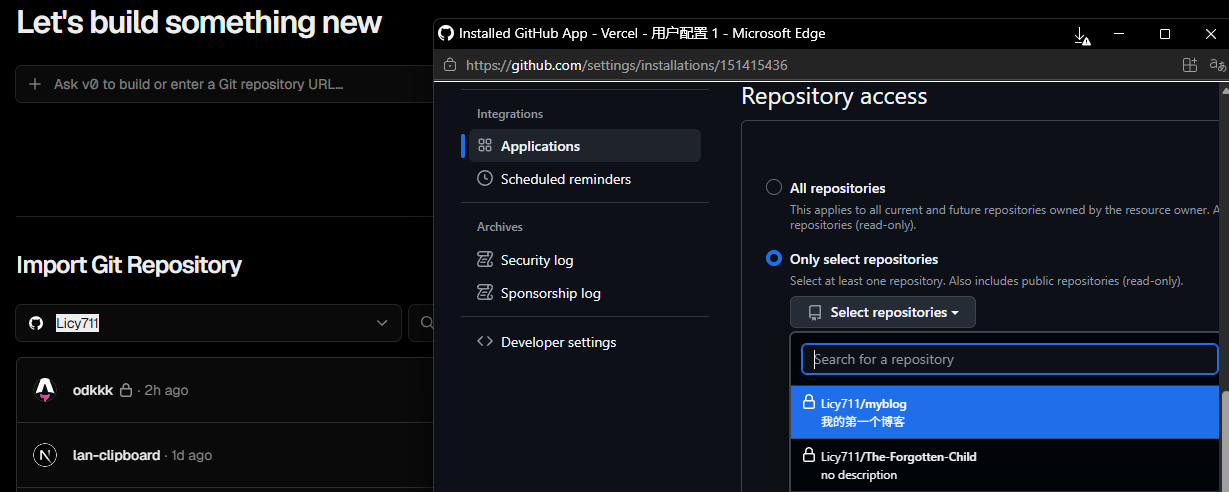
Bind your GitHub account
-
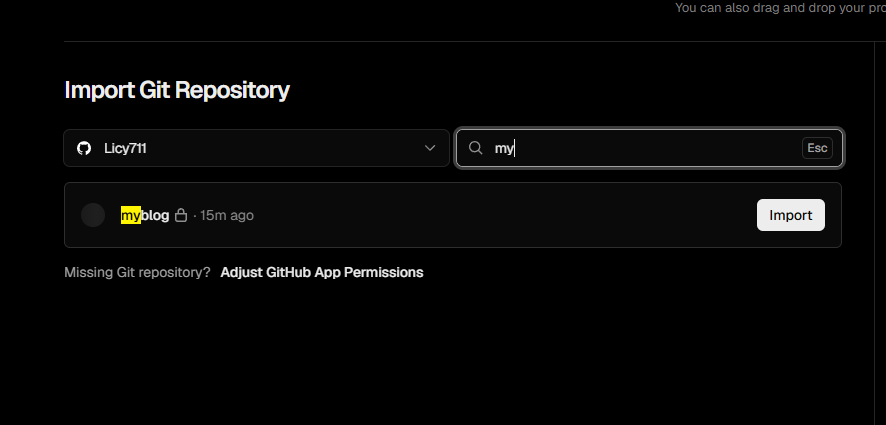
Check the warehouse you changed to create and save it. After saving successfully, search for the warehouse name and click Import
-
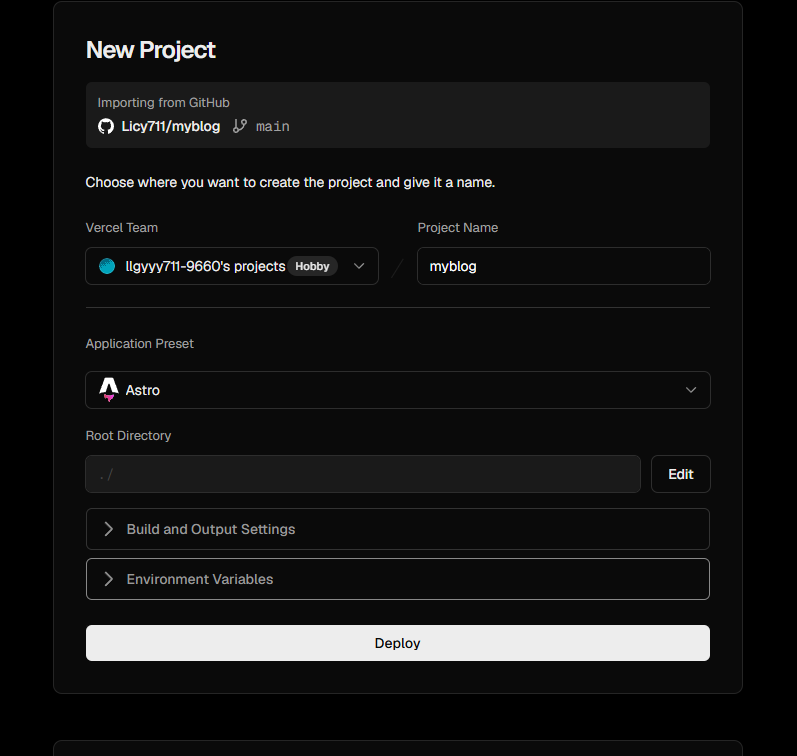
Since there are not many functions in the template blog, there is no need to configure environment variables or anything like that, we can just deploy it directly.
-
If your blog needs access keys later, you can put them in the environment variables here.
-
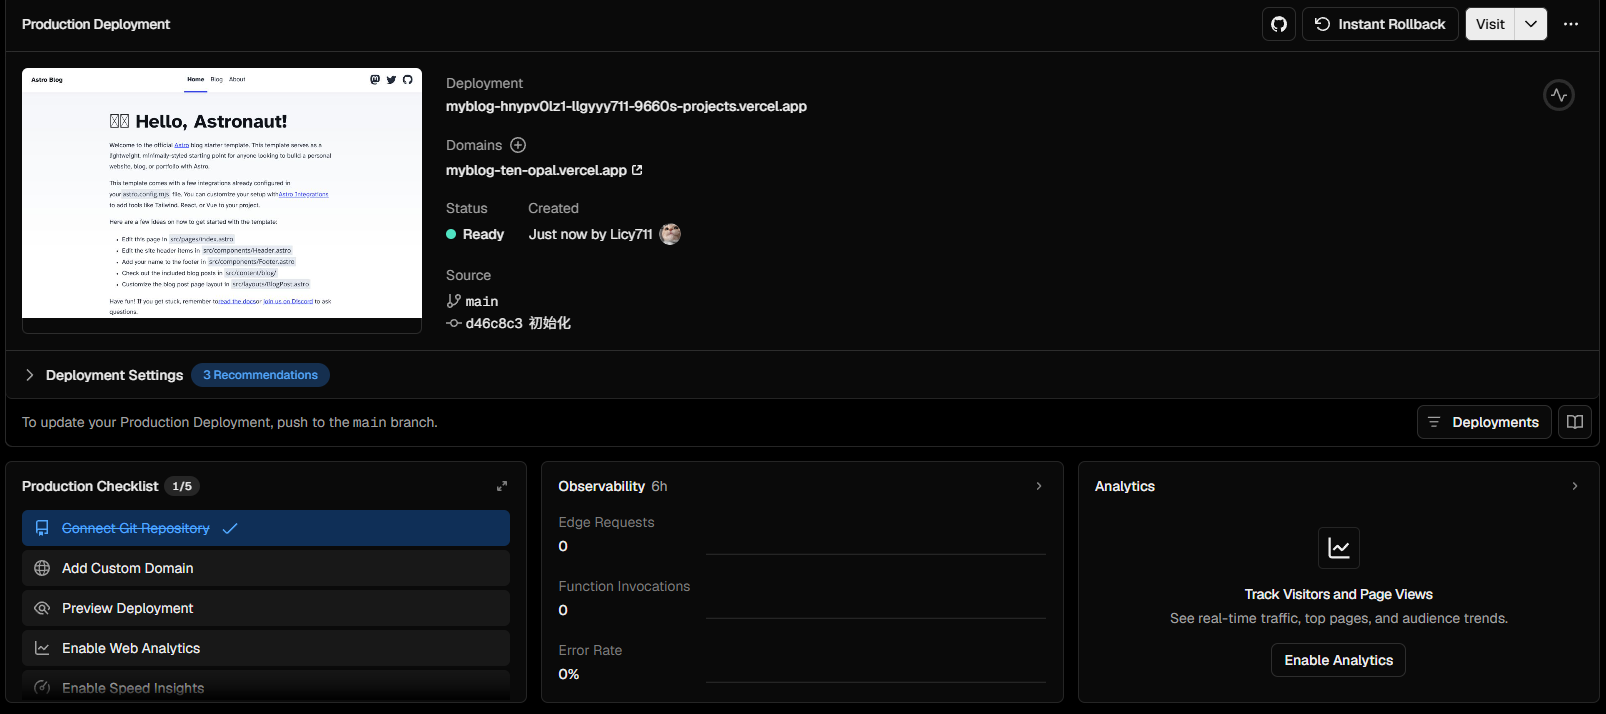
Deployed successfully, you can use the subdomain name he provided to preview (https://myblog-ten-opal.vercel.app)
-
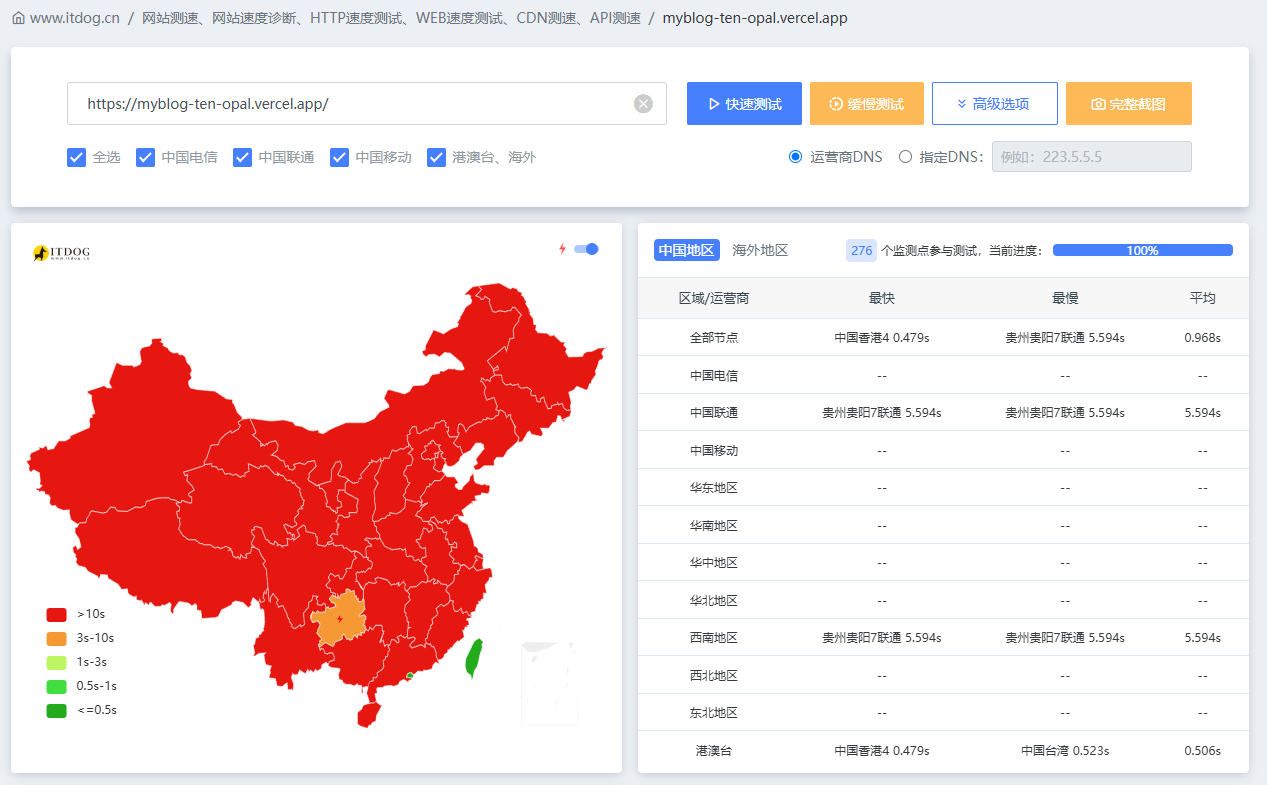
However, the domain name vercel.app is blocked in China, so it is best to bind your own domain name
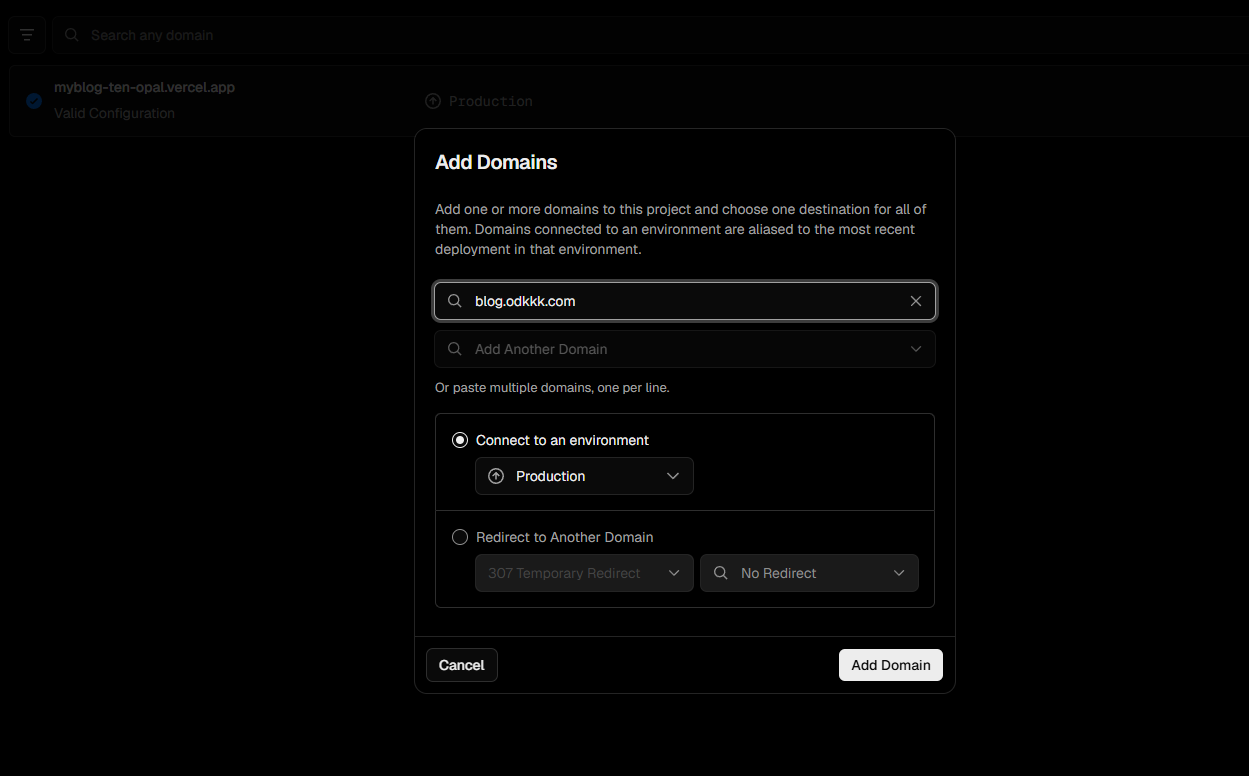
 -Here we can add a custom domain name
-
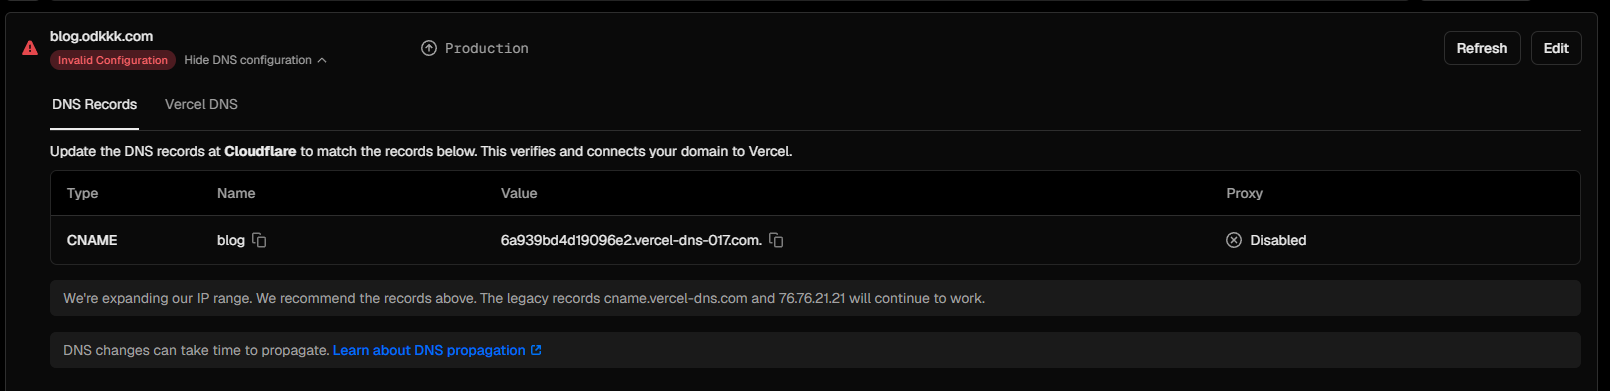
After adding it, we will parse cname to the domain name he specified.
-
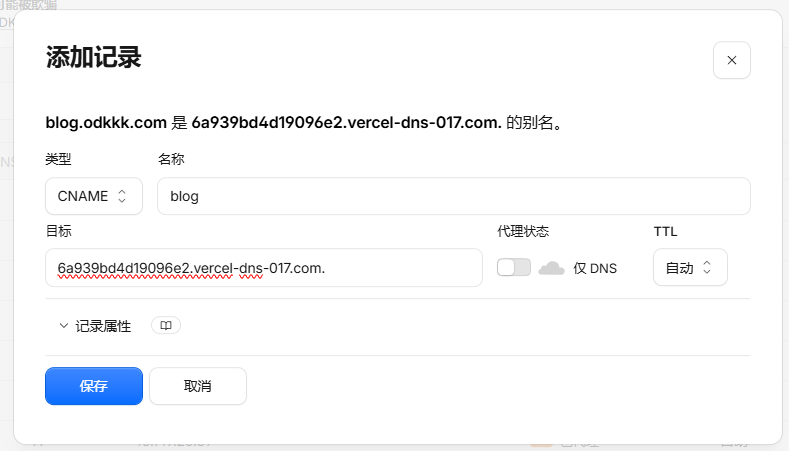
Add cname resolution. Here is an example of cloudflare. No need to turn on the proxy.
-
In this way, the domain name binding is completed, and the SSL certificate will be automatically generated, which can be viewed by visiting your custom domain name.

-
If you think the domestic speed is not good enough, you can give it to him
The cname address 6a939bd4d19096e2.vercel-dns-017.com is changed to cname-china.vercel-dns.com to resolve the point. Although the following content will be prompted in the list, it does not affect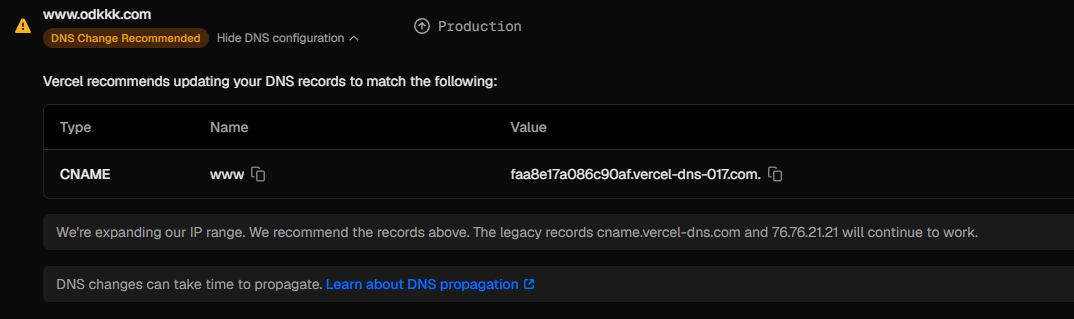
7. Follow-up/Summary
If you want to change the content later, just write an md file, git push and submit it to the GitHub repository. Vercel will automatically pull the latest code and redeploy it, no need to do it manually. When I wrote, I treated myself as a complete novice. I only took screenshots after every step was completed. I tried to write clearly where I might get stuck, such as which template to choose when creating Astro, how to authenticate the first Git push, and how to bind a domain name to Vercel. Because I have also stepped on pitfalls when I was struggling, and I know the feeling of being stuck and no one talks about it.
So this document is more like the notes I took while pretending, rather than a tutorial after the fact. If there is someone behind me who can get through it in one go, it will be all in vain.